
[ad_1]
New Apple iPhone 13 smartphones on display in the re: Store. The iPhone 13 went on sale September 24 in Russia.
Artyom Geodakyan | TASS | Getty Images
The latest version of the iPhone operating system, iOS 15, has new privacy features for people who pay for iCloud storage.
One of the handiest new features is the ability to create a temporary email address – an email address that is not linked to your identity but still forwards messages to your inbox. It’s called “Hide my mail”.
These burner emails are great for signing up for forms on the web that you might not want to share your primary email address with, Apple said when announcing the feature in June. Users can create as many burner email addresses as they want and delete them at their convenience.
However, there is a catch: users have to pay for iCloud storage. Hide My Email is part of iCloud +, a new set of privacy features for people who pay Apple for iCloud storage.
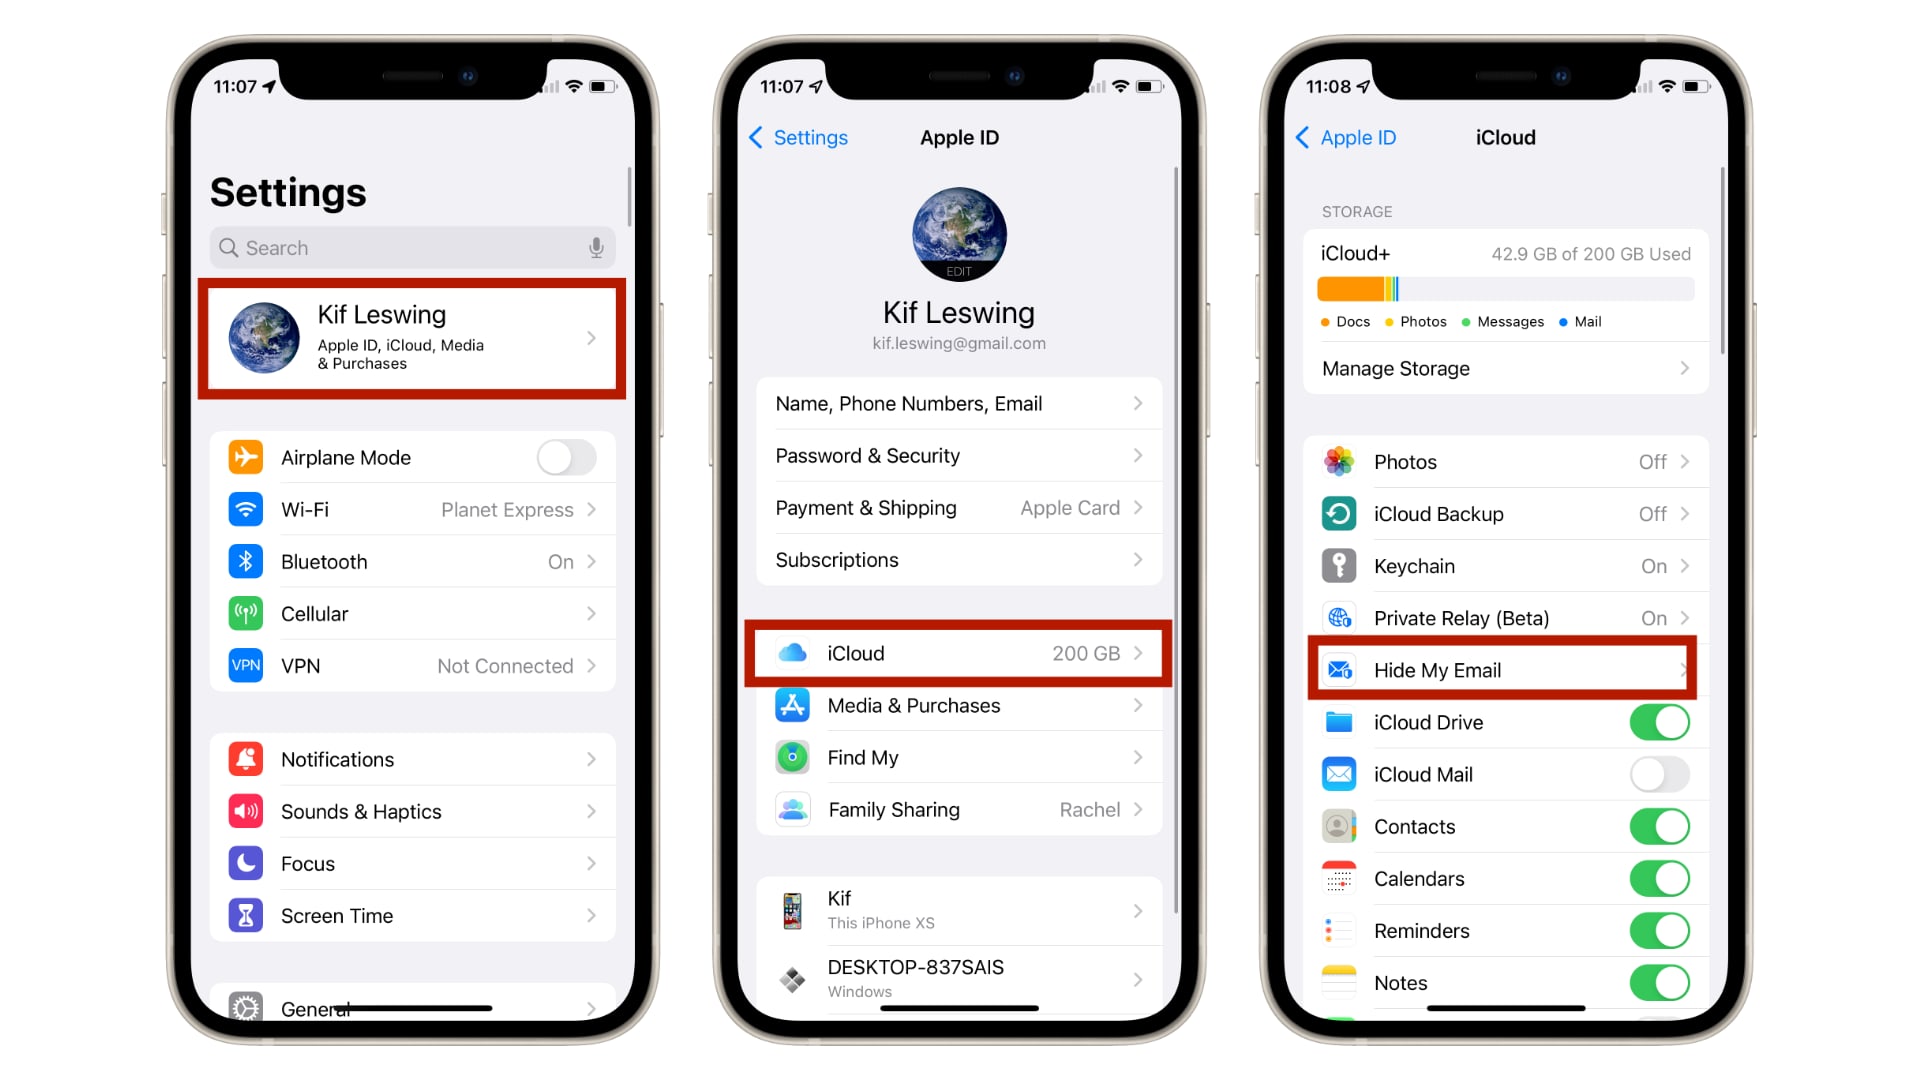
This is how it works:
Create a new email address
- Make sure you are subscribed to get additional iCloud storage. Hide My Mail works with any iCloud subscription, even the 50GB plan which costs $ 0.99 per month.
- Launch the settings app. It’s the one that looks like gears.
- Tap your Apple ID name at the top of the screen.
- Tap iCloud – it should show which storage plan you’re next to.
- Tap Hide my email.
- Tap Create new address.
- Fill out the form – you can label each burner email address and request a different, randomly generated burner email address.
- When you are done creating the email, you can use it anywhere and it will forward the messages to your Apple ID email account.
Change transfer address
- If you want to forward emails from burner emails to another email address, it’s that easy.
- Launch the settings app.
- Tap your Apple ID at the top of the screen.
- Tap iCloud, then tap Hide My Email.
- Scroll to the bottom of the screen. You should see a box titled “Forward to”.
- You might need to set up a new email address in your iCloud account – you can’t just connect just any email address.
[ad_2]
Source link